

[vc_row full_width=”stretch_row”][vc_column][vc_single_image image=”5877″ img_size=”full” alignment=”center” style=”vc_box_outline” border_color=”blue”][vc_empty_space][/vc_column][/vc_row][vc_row full_width=”stretch_row”][vc_column][vc_column_text]
| Content | Link |
|---|---|
| About Hifu | Read More |
| The Treatment Mechanism | Read More |
| Why HIFU treatment is better than other treatment? | Read More |
| Contraindications | Read More |
| Cautions | Read More |
| Selection of Cartridges | Read More |
| Areton Multiline HIFU Device Treatment Process on Face and Neck | Read More |
| Treatment Process on Buttock | Read More |
| Classic HIFU Device Treatment Process on Face and Neck | Read More |
| Treatment Process on Belly and Buttock | Read More |
| Three in One HIFU Device Treatment Process on upper-chest areas | Read More |
| Vaginal Rejuvenation | Read More |
| Video’s Training | Read More |
| About Perspex Test | Read More |
| Areton Multiline HIFU multiline perspex test | Read More |
| Questions & Answers | Read More |
| Notes for HIFU Treatment | Read More |
| Comparison Between Multiline and Classic HIFU Device | Read More |
| Full Treatment video’s | Read More |
[/vc_column_text][/vc_column][/vc_row][vc_row full_width=”stretch_row” css=”.vc_custom_1557637607760{background-image: url(http://areton-ltd.com/wp-content/uploads/2019/04/bg-square-1.png?id=5188) !important;}”][vc_column][vc_column_text]
About Hifu Device
The Multiline HIFU (High-Intensity Focused Ultrasound) device is equipped with cutting edge technology that allows to have more accurate sculpting of the face and body. The advanced cosmetic technology of the device can significantly tighten and lift several areas of the face, reduce the signs of aging and improve the tone of the skin in a single session, with potentially long-lasting effects. There are no incisions or major injuries to the surface of the skin.[/vc_column_text][vc_single_image image=”5047″ img_size=”full” style=”vc_box_outline” border_color=”blue”][vc_empty_space][/vc_column][/vc_row][vc_row][vc_column][vc_empty_space][vc_row_inner][vc_column_inner width=”1/2″][vc_column_text]
The Treatment Mechanism
HIFU is a non-invasive procedure that uses focused ultrasound energy. It targets deep dermis and SMAS; generates thermal coagulative zones in the targeted tissues without damaging the epidermis and subcutaneous tissues. This focused energy causes a contraction of the SMAS layer, as well as denaturation and remodeling of the targeted collagen fibers resulting in NEOCOLLAGENESIS, which then produces significant skin tightening and lifting tissues.[/vc_column_text][/vc_column_inner][vc_column_inner width=”1/2″][vc_single_image image=”5177″ img_size=”full” style=”vc_box_outline” border_color=”blue”][vc_empty_space][/vc_column_inner][/vc_row_inner][vc_row_inner][vc_column_inner width=”1/2″][vc_column_text]HIFU uses a high level of ultrasonic energy which is tightly focused into a small point to rapidly coagulate targeted tissues. The use of high intensity focused ultrasound has recently expanded from high-precision surgical procedures into the field of noninvasive cosmetic medicine. HIFU differs from other technologies used for skin rejuvenation. A concave disk within the transducer focuses ultrasound energy with very high intensity at specific locations below the epidermis and can specifically target the dermis or Superficial Muscular Aponeurotic System (SMAS) layer, a fibrous network consisting of collagen fibers, elastic fibers, and fat cells that connects the facial muscles with the dermis and is tightened during a facelift. Where applied, the energy at the focal point rapidly rises while tissue above and below the focal zone are unaffected. Application of HIFU causes collagen fibers to denature and contract and stimulates the production of new collagen that results in skin tightening and rejuvenation.[/vc_column_text][vc_btn title=”Shop Now!!” style=”outline” shape=”square” color=”danger” link=”url:http%3A%2F%2Fareton-ltd.com%2Fshop%2F|||”][/vc_column_inner][vc_column_inner width=”1/2″][vc_single_image image=”4973″ img_size=”full” style=”vc_box_outline” border_color=”blue”][/vc_column_inner][/vc_row_inner][vc_empty_space][/vc_column][/vc_row][vc_row full_width=”stretch_row” css=”.vc_custom_1557637847226{padding-top: 32pc !important;padding-bottom: 32px !important;background-image: url(http://areton-ltd.com/wp-content/uploads/2019/04/dot.png?id=5185) !important;}”][vc_column width=”1/2″][vc_column_text]
Why HIFU treatment is better than other treatment?
From shallow to the deep facial structure are divided into Epidermis, dermis, subcutaneous fat, SMAS, muscles, and bones. The traditional surgical face lifting process is to suspend SMAS and, thereby, that achieves skin tightening and lifting. Now using HIFU non-incision methods can easily reach an unprecedented treatment depth of 1.5mm to 4.5mm. Besides acting on fibrous SEPTA, HIFU can also act on deeper layer SMAS, while the traditional surgical process cannot do. Therefore, HIFU has broken the previous limit, is the first instrument for non-intrusive SMAS treatment. Every single HIFU energy point (TCP) under the skin can make the temperature up to 65-70C, is the highest temperature of all non-invasive skin tightening device.
[/vc_column_text][vc_empty_space][/vc_column][vc_column width=”1/2″][vc_empty_space][vc_single_image image=”5790″ img_size=”full” style=”vc_box_outline” border_color=”blue”][/vc_column][/vc_row][vc_row][vc_column][vc_empty_space][vc_column_text]
Contraindications
[/vc_column_text][vc_row_inner][vc_column_inner width=”2/3″][vc_column_text]
Issue 1: Marginal Mandibular Nerve
There have been reported cases of adverse reactions, such as — Marginal Mandibular Nerve damage. Two types of Marginal Mandibular Nerve damage are found, one of them cures up within a week, however, other remains permanently damaged and curable at all. Fortunately, no report of permanent HIFU Nerval damages has been reported to date, and this is consistent with the nature of the treatment with HIFU device.
- Stay aware of the areas where the mandibular nerve is located while treating with 4.5 mm and 3.0 mm depth of cartridges.
- It is recommended to avoid using anesthesia. Because of anesthesia, the treated area will be numb and any injury inside the treated area will not be recognized immediately. However, HIFU treatment can be carried out at tolerable intensity and therefore, if any nerve injury occurs, this will be very minor.
[/vc_column_text][/vc_column_inner][vc_column_inner width=”1/3″][vc_single_image image=”5089″ img_size=”full” style=”vc_box_outline” border_color=”blue”][/vc_column_inner][/vc_row_inner][vc_empty_space][vc_row_inner][vc_column_inner width=”1/3″][vc_single_image image=”5067″ img_size=”full” style=”vc_box_outline” border_color=”blue”][/vc_column_inner][vc_column_inner width=”2/3″][vc_column_text]
Issue 2: Don’t treat the middle of the throat
HIFU Treatment around the middle of the throat could be risky; because Adam’s apple, also known as the laryngeal prominence, lies superficially underneath the skin of the treated area. The Adam’s apple is made of cartilage, which is strong, but softer and more fragile than bone. This is a connective tissue presents throughout the body and also, makes up several other areas of the neck.
Because of the ablative nature of the machine, delivering ultrasonic energy over the area could injure bony parts of the treating area, as well as the thyroid gland. Thyroid gland exists just below The Adam’s apple, which releases thyroid hormone and control metabolism—the way our body uses energy. The thyroid hormones regulate vital body functions, including breathing, heart rate, level of Cholesterol, etc.[/vc_column_text][/vc_column_inner][/vc_row_inner][vc_empty_space][/vc_column][/vc_row][vc_row full_width=”stretch_row” el_class=”white” css=”.vc_custom_1557471528846{background-image: url(http://areton-ltd.com/wp-content/uploads/2019/04/bg-square-1.png?id=5188) !important;background-position: 0 0 !important;background-repeat: repeat !important;}”][vc_column][vc_empty_space][vc_column_text]When Performing Treatment on Forehead and Frown lines, reduce the power level as these are very delicate areas, you can also reduce the intensity of power in advanced power setting and carefully treat these areas. But never move the transducer on the upper eyelid area because the energy is delivered that goes deep inside the skin, not on the surface of the skin.[/vc_column_text][vc_column_text]HIFU devices can cause dents into hard pieces of perspex, shatter glass, etc., this demonstrates their ablative power which is significant and should not be undermined. The surface of the cartridge is covered by an insulating layer protected by an ablative material in contact with ultrasonic power flow. So the improper power setting and improper use of the machine can leave a wound on the skin.[/vc_column_text][vc_column_text]Braising is one of the adverse reactions to HIFU facial treatment. It is a normal reaction to the treatment because of the ablation occurs at the dermal layer where blood supplies through the blood vessels. When ultrasonic energy is delivered into the skin, the blood vessels can be ruptured and can cause bruising. This an inevitable reaction of HIFU treatment, but fortunately, this a temporary and very natural reaction to this type of treatment.[/vc_column_text][vc_column_text]HIFU devices can cause dents into hard pieces of perspex, shatter glass, etc., this demonstrates their ablative power which is significant and should not be undermined. The surface of the cartridge is covered by an insulating layer protected by an ablative material in contact with ultrasonic power flow. So the improper power setting and improper use of the machine can leave a wound on the skin.[/vc_column_text][vc_column_text]HIFU devices can cause dents into hard pieces of perspex, shatter glasses, etc., This demonstrates their ablative power which is significant and should not be undermined. It is because of this ablative nature that these devices if used improperly can cause various injuries.[/vc_column_text][vc_empty_space][/vc_column][/vc_row][vc_row][vc_column][vc_column_text]
- The presence of open wounds or lesions,
- Severe cystic acne,
- The presence of active implants (such as pacemakers and defibrillators) or metallic implants in the planned treatment area,
- Pregnancy and so on.
[/vc_column_text][vc_column_text] HIFU devices should not be used on [/vc_column_text][vc_single_image image=”4853″ img_size=”full” style=”vc_box_outline” border_color=”blue”][/vc_column][/vc_row][vc_row full_width=”stretch_row” css=”.vc_custom_1557472098448{background-image: url(http://areton-ltd.com/wp-content/uploads/2019/04/dot.png?id=5185) !important;}”][vc_column][vc_empty_space][vc_column_text]
Selection of Cartridges
[/vc_column_text][vc_row_inner][vc_column_inner width=”1/2″][vc_single_image image=”5091″ img_size=”full” style=”vc_box_outline” border_color=”blue”][/vc_column_inner][vc_column_inner width=”1/2″][vc_single_image image=”5083″ img_size=”full” style=”vc_box_outline” border_color=”blue”][/vc_column_inner][/vc_row_inner][vc_empty_space][/vc_column][/vc_row][vc_row][vc_column][vc_empty_space][vc_column_text]
Areton Multiline HIFU Device Treatment Process on Face and Neck
[/vc_column_text][vc_row_inner][vc_column_inner width=”1/2″][vc_single_image image=”5075″ img_size=”full”][/vc_column_inner][vc_column_inner width=”1/2″][vc_column_text]
- Before starting treatment, draw lines on the face and neck as it is drawn in the above picture.
- Mark the area where the treatment has to be avoided as it is marked by pink.
- Then attach a 4.5 mm cartridge with handle
- Apply ultrasonic conducting gel to the treating areas of face and neck.
- Start treatment of the neck using 4.5mm depth of the cartridge on the lowest power setting and gradually move towards chin and cheek.
- Treat temple area and forehead on minimum power setting. The level of energy can be controlled by Length, width, clearance, and pitch. So, you can change the intensity of energy by changing length and width.
- The 4.5mm cartridge delivers energy into 4.5 mm depth of the skin
- Then replace the cartridge with 3.0; repeat the same process with this cartridge. The energy is delivered the 3.0mm depth of the skin.
- The Marginal Mandibular Nerve areas can be treated with a 1.5mm depth of cartridge, but it is not mandatory to treat this area. However, always keep a safe distance from these sensitive areas during treatment.
- During treatment keep the clients head still while energy is delivered in a higher power setting.
[/vc_column_text][/vc_column_inner][/vc_row_inner][vc_empty_space][vc_video link=”https://youtube.com/embed/-Cn8uXM14Sg” size=”500″ height_size=”400″][vc_empty_space][/vc_column][/vc_row][vc_row full_width=”stretch_row” css=”.vc_custom_1557475259607{background-image: url(http://areton-ltd.com/wp-content/uploads/2019/04/bg-square-1.png?id=5188) !important;}”][vc_column][vc_empty_space][vc_row_inner][vc_column_inner width=”1/2″][vc_column_text]DL 8.0mm and DL 13.0mm
- Draw lines as shown in the picture above; It helps to keep in mind about the area where HIFU treatment is restricted and also it helps to perform a uniformed treatment.
- Draw lines 1 finger away from ribs and 4 fingers away from the pelvic area;
- Apply ultrasound conducting gel to the treated area; complete one side of the treatment and then, start another side
- Start treatment using 16.0mm depth of cartridge; underneath of the skin, there are adipose tissues and so, using the deepest depth of cartridge will not be harmful.
- To increase the intensity of treatment, increase the number of lines and keep the power low.
- To deliver 11 lines in a particular area, keep the treatment head still and deliver 11 lines in one shot; then move on to a different place and repeat it again to deliver 11 lines in a certain area.
- Following the arrow drawn in the above picture, move the treatment head upward and from side of the belly, move the transducer inwards (towards belly button).
- Gradually increase power and make sure that the client is feeling comfortable.
- Replace the cartridge with 8.0mm and place the ablative spots (The treatment head) perpendicularly to have a crossover effect.
- Start from the middle and keep the treatment head still to deliver 11 lines of shots into the skin; Then move to another spot repeat the process.
[/vc_column_text][vc_btn title=”Shop Now!!!” link=”url:http%3A%2F%2Fareton-ltd.com%2Fshop%2F|||”][/vc_column_inner][vc_column_inner width=”1/2″][vc_single_image image=”4763″ img_size=”full” style=”vc_box_outline”][vc_empty_space][vc_single_image image=”5118″ img_size=”full” style=”vc_box_outline”][/vc_column_inner][/vc_row_inner][vc_empty_space][vc_video link=”https://youtube.com/embed/vQ3Qz4O-wHk” size=”500″ height_size=”400″][vc_empty_space][/vc_column][/vc_row][vc_row][vc_column][vc_empty_space][vc_column_text]
Treatment Process on Buttock
[/vc_column_text][vc_row_inner][vc_column_inner width=”1/2″][vc_single_image image=”5070″ img_size=”full” style=”vc_box_outline” border_color=”blue”][/vc_column_inner][vc_column_inner width=”1/2″][vc_column_text]DL 8.0mm and DL 13.0mm
- Draw lines as shown in the picture above; It helps to keep in mind about the area where HIFU treatment is restricted and also it helps to perform a uniformed treatment. Apply ultrasound conducting gel to the treating area.
- Begin treatment with the deepest cartridge, 16.0mm and following the arrow lines drawn on the image above, perform treatments from the bottom of the buttock and move upward.
- Deliver 11 lines of shot with the highest width of 10.0mm; keep the treating head still on one spot to deliver full energy into the skin and when full energy is delivered, move on 10mm upward to another spot, .
- Continue this process until the treatment process is finished to get good coverage of the area.
[/vc_column_text][/vc_column_inner][/vc_row_inner][vc_empty_space][/vc_column][/vc_row][vc_row full_width=”stretch_row” css=”.vc_custom_1557478608145{background-image: url(http://areton-ltd.com/wp-content/uploads/2019/04/bg-square-1.png?id=5188) !important;}”][vc_column][vc_empty_space][vc_column_text]
Classic HIFU Device
[/vc_column_text][vc_row_inner][vc_column_inner width=”1/2″][vc_column_text]
- Draw rectangular boxes on the face and neck as it is drawn in the above picture.
- Apply ultrasonic conductive gel on the transducer.
- Start treatment with a 4.5mm depth of cartridge; keep the power level low on starting.
- Start treatment from cheek areas and place the dots of cartridge in the rectangular boxes and move up and down by 1mm.
- In order to have a more tolerating level, you can adjust the power in the advanced setting. Here you can increase and decrease the intensity of energy.
- As much as the client can tolerate the intensity of power, you increase the power gradually.
- When 31 lines will be delivered, stop performing treatment and wipe the areas. However, if you think appropriate to deliver more shots, you can do it. But, 4.5mm depth of cartridge is the highest depth of cartridge for face because with this cartridge energy goes into 4.5mm depth of the skin. So you must be careful in delivering more shots.
- However, the software will not allow you to deliver more shots at a time than the number of shots displayed on-screen. So when it reaches at 31 shots, stop performing the treatmen
[/vc_column_text][/vc_column_inner][vc_column_inner width=”1/2″][vc_column_text]
Treatment Process on Face and Neck
DL 1.5mm, 3.0mm and 4.5mm[/vc_column_text][vc_single_image image=”5072″ img_size=”full” style=”vc_box_outline” border_color=”blue”][/vc_column_inner][/vc_row_inner][vc_empty_space][/vc_column][/vc_row][vc_row][vc_column width=”2/3″][vc_column_text]
- Now replace the cartridge with 3.0mm and if you look at the software, you will see the depth of cartridge has changed.
- The system will show which areas can be treated with 3.0mm cartridge and the number of shots for each individual area will be displayed.
- Now draw lines as it is shown in the software and then apply the ultrasound conductive gel on the cartridge to start treatment.
- Adjust the power level and it is advised to keep the power level lower at the beginning of treatment. You can gradually increase the power level, but always make sure that the client is feeling comfortable with the increased power level.
- Move the transducer up and down by 1mm while treating on the cheek and deliver as many shots as shown in the software or you can decide the appropriate number of shots.
- When delivering the energy on cheek is finished, treat the areas around the eyes with 3.0mm cartridge. Before starting, you must reduce the power level for the areas around eyes.
- Then move to the neck and deliver energy, according to the number of shots shown in the software.
- As of a delicate area close to the ear, deliver 11 lines of shot. Different nerves of this area connect to the mandibular nerve zone, which is shown in the adjacent picture and so the treatment has to be performed carefully in this area.
[/vc_column_text][/vc_column][vc_column width=”1/3″][vc_empty_space][vc_single_image image=”5080″ img_size=”full” style=”vc_box_outline” border_color=”blue”][/vc_column][/vc_row][vc_row][vc_column][vc_empty_space][vc_row_inner][vc_column_inner width=”1/2″][vc_single_image image=”5071″ img_size=”full” style=”vc_box_outline” border_color=”blue”][/vc_column_inner][vc_column_inner width=”1/2″][vc_single_image image=”5546″ img_size=”full” style=”vc_box_outline” border_color=”blue”][/vc_column_inner][/vc_row_inner][vc_empty_space][vc_column_text]
- After completing the treatment with a 3.0mm depth of cartridge, insert 1.5mm depth of cartridge. The software will automatically show the changes in the cartridge and display the corresponding areas which can be treated with 1.5mm. This is the safest cartridge for a facial treatment, especially in the areas where using 3.0mm and 4.5mm cartridges are strongly advised to be avoided.
- This cartridge delivers energy into the 1.5mm depth of the skin and works safely into the superficial depth of the skin.
- The number of shots to be delivered will be shown in the system interface; deliver energy according to that number.
- Follow the same procedure that you did with 3.0mm and 4.5mm depth of cartridges.
- The client may feel a tingling sensation; it will go off within a few days.
[/vc_column_text][/vc_column][/vc_row][vc_row full_width=”stretch_row” css=”.vc_custom_1557479797859{background-image: url(http://areton-ltd.com/wp-content/uploads/2019/04/bg-square-1.png?id=5188) !important;}”][vc_column][vc_empty_space][vc_column_text]
Treatment Process on Belly and Buttock
[/vc_column_text][vc_row_inner][vc_column_inner width=”1/2″][vc_column_text]
- With HIFU classic, you can only use 8.0mm and 13.0mm depth of cartridge for body treatment and these are the only options with this device. These two cartridges can be used on the belly, inner thighs, and outer thighs and below of the arm.
- First, draw lines from the middle of the belly as shown in the picture above and draw the lines 1 finger below the ribs and 4 fingers above the pelvic areas. All the perpendicular lines will be 25mm apart from each other and try to draw the lines as much as possible straight.
- Apply gel and start treatment with a 13.0mm depth of cartridge on a lower power setting and you can gradually increase the power level as well as you can make a power adjustment in advanced power setting; but as much as you will increase the power do confirm with clients whether the power is tolerable or not.
[/vc_column_text][/vc_column_inner][vc_column_inner width=”1/2″][vc_single_image image=”5082″ img_size=”full”][/vc_column_inner][/vc_row_inner][vc_empty_space][vc_column_text]
- Move the transducer downwards by 1mm from the ribs towards the pelvic area. Continue the process up to the area above the pelvic zone. Now move in the opposite direction towards ribs and this way complete all the columns you have drawn.
- Avoid using anesthesia and you should adjust the power level instead. Potentially it is not harmful treating on the abdomen as the deep layer of the skin consists of adipose tissues and you are not making any harmful effect on these areas.
- The clients may have a feeling of sticking needles into the skin and when you will move the transducer second time on the treating areas, the client may feel more pain than earlier as you have already gone through the area.
- This way, finish treating one line to another after 25mm.
[/vc_column_text][vc_empty_space][vc_row_inner][vc_column_inner width=”1/2″][vc_column_text]
- Draw the lines 25mm apart from each other as shown in the picture; It helps to keep in mind about the area where HIFU treatment is restricted and also it helps to perform a uniformed treatment.
- Apply ultrasound conducting gel to the treated area or you also can use the gel on the cartridge.
- Begin treatment with a 13.0mm cartridge and deliver 200-300 of shots per cartridge in one side.
- Following the columns, move the handle up by 2-3mm which is directed with red arrows in the picture above; perform the treatment from the right side and bottom of the buttock.
- After completing the line, come down following the opposite direction of the same path which is marked with yellow arrows in the above picture.
- You can increase the power level as the area is comparatively safer and deliver energy as much as possible on a higher power setting; but always confirm with the client whether the intensity of energy is tolerable or not.
- Place the treating head horizontally to the body and continue this process until the treatment process is finished to get good coverage of the area.
[/vc_column_text][/vc_column_inner][vc_column_inner width=”1/2″][vc_single_image image=”5432″ img_size=”full”][/vc_column_inner][/vc_row_inner][vc_empty_space][/vc_column][/vc_row][vc_row full_width=”stretch_row”][vc_column][vc_empty_space][vc_column_text]
Three in One HIFU Device
Treatment Process on upper-chest areas[/vc_column_text][vc_row_inner][vc_column_inner width=”1/2″][vc_column_text]
- Draw lines as it is drawn in the picture below.
- Keep the lines 25mm apart from each other; after drawing all the lines, there will be 25²mm square shaped box
- The areas adjacent to the bony areas, keep the length of the square boxes 25mm and width less than 25mm
- Use 8.0mm and 13.0mm cartridge for body treatment. In case of the client with low fat and thinner depth of skin, you can use 4.5mm, 3.0mm and 1.5mm cartridges.
- Place the transducer in the square and move from top to deliver energy. For each shot displace the transducer by 2mm and deliver 13 lines of energy vertically and 12 lines horizontally or vise-versa
- When delivering energy in the narrow boxes, adjust length according to the length of boxes and deliver 13 lines of energy vertically and 12 lines horizontally or vise-versa.
[/vc_column_text][vc_column_text]
- Draw lines as it is drawn in the picture below.
- Keep the lines 25mm apart from each other; after drawing all the lines, there will be 25²mm square shaped box
- The areas adjacent to the bony areas, keep the length of the square boxes 25mm and width less than 25mm
- Use 8.0mm and 13.0mm cartridge for body treatment. In case of the client with low fat and thinner depth of skin, you can use 4.5mm, 3.0mm and 1.5mm cartridges.
- Place the transducer in the square and move from top to deliver energy. For each shot displace the transducer by 2mm and deliver 13 lines of energy vertically and 12 lines horizontally or vise-versa
[/vc_column_text][/vc_column_inner][vc_column_inner width=”1/2″][vc_single_image image=”5903″ img_size=”full”][vc_empty_space][vc_single_image image=”5906″ img_size=”full”][/vc_column_inner][/vc_row_inner][vc_empty_space][/vc_column][/vc_row][vc_row full_width=”stretch_row” css=”.vc_custom_1557580474944{background-image: url(http://areton-ltd.com/wp-content/uploads/2019/04/bg-square-1.png?id=5188) !important;}”][vc_column][vc_empty_space][vc_column_text]
Vaginal Rejuvenation
3.0mm and 4.5mm cartridge[/vc_column_text][vc_row_inner][vc_column_inner width=”1/2″][vc_column_text]The 3 in 1 HIFU device has no basic difference with other professional HIFU devices in treating face and body. This device has the additional advantage of tightening the vaginal canal and there are two cartridges, 3.0mm and 4.5mm, for vaginal rejuvenation. Comparing with classic HIFU device, it does not show the number of lines to be delivered when performing treatment on face and body and this device can perform vaginal rejuvenation. Other than these two differences, setting up all parameters is as same as classic HIFU device.[/vc_column_text][vc_column_text]
- For face and body treatment, it has five cartridges; among them 1.5mm, 3.0mm, and 4.5mm are for face treatment and 8.0mm and 13.0mm are used for treating body. The classic HIFU device is accompanied with similar five cartridges for treating face and body.
- This device is light-weight and portable; it provides cost-effective treatment as the cartridges are comparatively cheap.
- The maximum length of the line is 25mm and can be adjusted according to requirement.
- The pitch which means the distance between one dot to another; the maximum pitch is 5.0mm and can be minimized up to 1.0mm.
- The power setting option is similar to other HIFU devices; The minimum power level is 0.20j and it can be increased to maximum 1.50j. The on-screen power setting is just an indication as to the other professional HIFU devices and the power is regulated in advanced power setting screen. I
- This device has an AUTO option; which means that the device will automatically perform treatment on pre-setting parameter.
- Lower the angle higher the line of shots will be delivered.
- When treating face and body, this device shows the corresponding areas of treatment with changes of cartridges; however, the difference with classic HIFU is this device does not show the number of lines to be delivered.
[/vc_column_text][/vc_column_inner][vc_column_inner width=”1/2″][vc_single_image image=”5899″ img_size=”full”][vc_empty_space][vc_single_image image=”5894″ img_size=”full”][/vc_column_inner][/vc_row_inner][vc_empty_space][/vc_column][/vc_row][vc_row full_width=”stretch_row”][vc_column][vc_empty_space][vc_row_inner][vc_column_inner width=”1/2″][vc_video link=”https://youtube.com/embed/Fib0XSAoM_c” size=”500″ height_size=”400″][/vc_column_inner][vc_column_inner width=”1/2″][vc_video link=”https://youtube.com/embed/eWgD3SWYygI” size=”500″ height_size=”400″][vc_empty_space][/vc_column_inner][/vc_row_inner][vc_empty_space][vc_video link=”https://youtube.com/embed/FAhQosm9eYE” size=”500″ height_size=”400″][vc_empty_space][/vc_column][/vc_row][vc_row full_width=”stretch_row” css=”.vc_custom_1557481936153{background-image: url(http://areton-ltd.com/wp-content/uploads/2019/04/dot.png?id=5185) !important;}”][vc_column][vc_column_text]
About Perspex Test
[/vc_column_text][vc_row_inner][vc_column_inner width=”1/2″][vc_column_text]
The length, width, clearance, pith, and power— these five variables are the main mechanism of the Multiline HIFU Device. Setting up more dense of dots the least distance between lines along with the highest length and width will deliver more energy to the skin. The perspex test will show about the effects of using maximum intensity of energy during treatment.
[/vc_column_text][vc_column_text]
- First put the cartridge into the handle.
- Set the parameters on screen; set Length 25mm and width 10mm, keep clearance and pitch at lowest value 1.0mm, set power at a maximum value of 4.5j.
- Apply gel on the cartridge.
- Put the perspex on the cartridge and push start button on the screen.
[/vc_column_text][vc_column_text]
Now you are going to deliver 11 lines of shots with 26 dots in each line; means the highest level of energy is being delivered. After delivering 11 lines, the color of the dots will be changed to red. It means ultrasonic energy has been delivered.
[/vc_column_text][/vc_column_inner][vc_column_inner width=”1/2″][vc_single_image image=”4649″ img_size=”full” style=”vc_box_outline” border_color=”blue”][/vc_column_inner][/vc_row_inner][/vc_column][/vc_row][vc_row][vc_column][vc_column_text]
Areton Multiline HIFU multiline perspex test
[/vc_column_text][vc_video link=”https://youtube.com/embed/Jjfc-fDb1H8″ size=”500″ height_size=”400″][vc_empty_space][/vc_column][/vc_row][vc_row][vc_column][vc_column_text]
| Questions | Answers | Pictures |
|
Use as much as you need, you can apply the gel on treatment areas. | 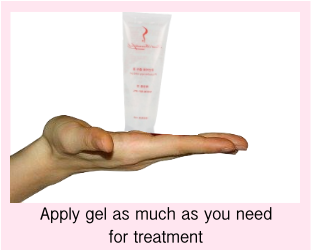 |
|
Either on skin or cartridge, there is no problem. | 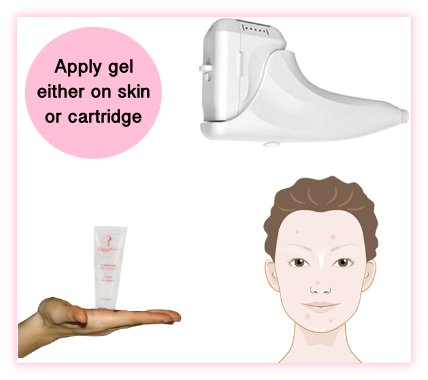 |
|
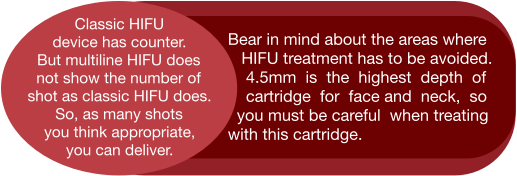
There is no rule of thumbs. As many shots you think appropriate, you can deliver. But the more you will do, the more you will lose the longevity of cartridges and replacing cartridge is costly. However, the classic HIFU software shows the number of shots to be delivered, but the multiline device does not show the number of shots. So, how many numbers of shots you think appropriate, you can deliver with both the device. It is also important to bear in mind that 4.5mm is the highest depth of the cartridge for the face and neck, so you must be careful when treating with this cartridge. |
 |
|
Yes, you can. | 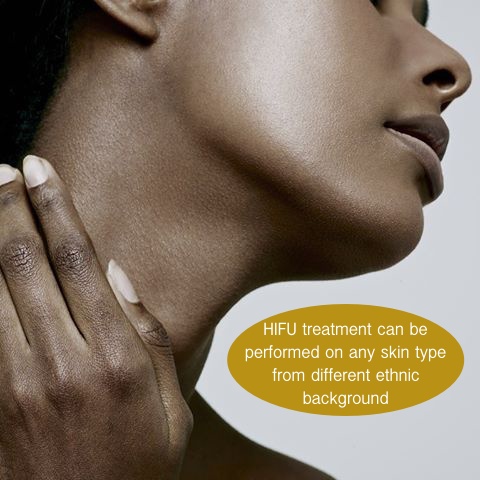 |
|
Yes, you can. You can use 3.0mm depth of cartridge with reduced power setting and carefully perform the treatment as the areas are so sensitive. Additionally, adjust the power level in advance power setting and keep the intensity of energy lower. | 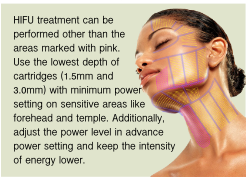 |
|
HIFU treatment has not been shown to interfere with the effects of Botox or Fillers. |  |
|
Never use anesthetics, adjust power setting instead. |
 |
| The classic HIFU device shows visual images with suggested treatment areas which change with the changes of the cartridge. It means that the areas are displayed where treatment can be performed with a particular cartridge. But multiline HIFU does not have this option and the practitioners have to know about the treatment areas and its suitable cartridges. | ||
|
HIFU treatment can be performed after 3 months. |  |
|
Please make sure that the client is healthy and not under medications. If the client took steroid injection, you should not perform HIFU treatment. |  |
[/vc_column_text][vc_empty_space][/vc_column][/vc_row][vc_row full_width=”stretch_row” css=”.vc_custom_1557581885347{background-image: url(http://areton-ltd.com/wp-content/uploads/2019/04/bg-square-1.png?id=5188) !important;}”][vc_column][vc_empty_space][vc_row_inner][vc_column_inner width=”2/3″][vc_column_text]
Notes for HIFU Treatment
[/vc_column_text][vc_column_text]
- In order to make the power level more tolerable for clients, you can decrease the intensity of power in an advanced setting.

- Always make sure the power level is tolerable for the patients.
- Patients with thinner skin or low fat underneath the skin may not be able to bear a higher intensity of energy.
- The tingling sensation is very common and normal during treatment.
- Some clients feel sticking needles into the skin.
- Second time treatment during the same session could be more painful than earlier as the transducer already treated the area and penetrated energy into the skin.
[/vc_column_text][/vc_column_inner][vc_column_inner width=”1/3″][vc_single_image image=”5440″ img_size=”full”][/vc_column_inner][/vc_row_inner][vc_empty_space][/vc_column][/vc_row][vc_row][vc_column][vc_empty_space][vc_column_text]
Comparison Between Multiline and Classic HIFU Device
[/vc_column_text][vc_single_image image=”5541″ img_size=”full”][vc_empty_space][/vc_column][/vc_row][vc_row][vc_column][vc_empty_space][vc_column_text]
Areton Multiline HIFU Treatment Process
[/vc_column_text][vc_row_inner][vc_column_inner width=”1/2″][vc_empty_space][vc_column_text]
Areton Multiline HIFU Treatment Process on Face & Neck
(short Version)
[/vc_column_text][vc_video link=”https://youtube.com/embed/1lxbwOA5_64″ size=”400″ height_size=”400″][vc_empty_space][/vc_column_inner][vc_column_inner width=”1/2″][vc_empty_space][vc_column_text]
Areton Multiline HIFU Treatment Process on Face & Neck
(Full Length)
[/vc_column_text][vc_video link=”https://youtube.com/embed/fsQB4TKHqlI” size=”400″ height_size=”400″][vc_empty_space][/vc_column_inner][/vc_row_inner][vc_row_inner][vc_column_inner width=”1/2″][vc_empty_space][vc_column_text]
Areton Multiline HIFU Treatment Process on Belly & Gluts
(Short Version)
[/vc_column_text][vc_video link=”https://youtube.com/embed/bXCdlYK1oXk” size=”400″ height_size=”400″][vc_empty_space][/vc_column_inner][vc_column_inner width=”1/2″][vc_empty_space][vc_column_text]
Areton Multiline HIFU Treatment Process on Belly & Gluts
(Full Length)
[/vc_column_text][vc_video link=”https://youtube.com/embed/wyJfXCTdqj8″ size=”400″ height_size=”400″][vc_empty_space][/vc_column_inner][/vc_row_inner][/vc_column][/vc_row][vc_row][vc_column][vc_column_text]
Classic HIFU Treatment Process
[/vc_column_text][vc_row_inner][vc_column_inner width=”1/2″][vc_empty_space][vc_column_text]
Areton HIFU Classic Face & Neck Treatment (Trailer)
[/vc_column_text][vc_video link=”https://youtube.com/embed/L2fANNuoPPE” size=”400″ height_size=”400″][vc_empty_space][/vc_column_inner][vc_column_inner width=”1/2″][vc_empty_space][vc_column_text]
Areton HIFU Classic Face & Neck Treatment (Full Length)
[/vc_column_text][vc_video link=”https://youtube.com/embed/L2fANNuoPPE” size=”400″ height_size=”400″][vc_empty_space][/vc_column_inner][/vc_row_inner][vc_row_inner][vc_column_inner width=”1/2″][vc_empty_space][vc_column_text]
Areton HIFU Classic Body Treatment (Trailer)
[/vc_column_text][vc_video link=”https://youtube.com/embed/B6nuAigDZAw” size=”400″ height_size=”400″][vc_empty_space][/vc_column_inner][vc_column_inner width=”1/2″][vc_empty_space][vc_column_text]
Areton HIFU Classic Body Treatment (Full Length)
[/vc_column_text][vc_video link=”https://youtube.com/embed/-IvoicBKyFQ” size=”400″ height_size=”400″][vc_empty_space][/vc_column_inner][/vc_row_inner][/vc_column][/vc_row]